Where the Race Will Be Won and Lost: Dissecting the Red Bull Ring’s Overtaking Battlegrounds
Of all the venues on the Formula 1 calendar, few concentrate their drama as efficiently as the Red Bull Ring.
At just 4.318 kilometres, the Spielberg circuit packs more genuine wheel-to-wheel opportunity into its short lap than tracks twice its length, courtesy of a topography that punishes late braking, a layout that rewards commitment, and — in 2026 — a brand-new set of active-aerodynamics rules that are poised to shake up every strategic calculation a driver and engineer make on Sunday afternoon.
With Kimi Antonelli leading Lewis Hamilton by 41 points in the championship, and a restless Spielberg crowd willing Max Verstappen back to something resembling form on the team’s de facto home circuit, the tactical ingredients for an absorbing race are already in place.
Here is a full breakdown of where the action is most likely to happen — and why the new Straight Mode and Overtake Mode regulations make the 2026 edition particularly compelling to study before lights out.
From DRS to Straight Mode: How the 2026 Rules Change Everything
The most significant infrastructure shift at the Red Bull Ring this year is the complete abolition of the traditional Drag Reduction System. In its place, the FIA has introduced two distinct tools under the 2026 active-aerodynamics framework: Straight Mode (SM) and Overtake Mode.
Straight Mode allows a car’s front and rear wings to physically open into a low-drag configuration on designated sections of the circuit — it is available to every driver, not just the chasing car, and is built into the car’s standard aero behaviour on approved straights.
For the 2026 Austrian GP, the FIA has designated four Straight Mode zones around the Red Bull Ring. These span the start/finish straight, the uphill acceleration run toward Turn 3, and additional sections through Sectors 2 and 3.
The layout means that drag reduction is a near-continuous feature of the lap rather than a brief flap-opening reward for the car behind, fundamentally altering the relative pace calculations that strategic teams must model overnight.
Overtake Mode operates as a separate, proximity-triggered boost. A pursuing driver who is within one second of the car ahead at the designated detection point — located in the third sector between Turns 9 and 10, with the activation line at the exit of Turn 10 — gains access to a lap’s worth of additional electrical energy reserve for the following lap.
The system is managed automatically by the car’s ECU; unlike the old DRS button, the driver cannot simply choose to deploy it whenever the wing-open signal appears. If the gap exceeds one second at the detection point, the boost is denied for that lap.
Taken together, these changes should ensure that any driver who builds a lead risks having a very aggressive pursuer armed with extra energy on the next pass through Sector 3 and down into the braking zones.
Turn 3 — The Remus Hairpin: F1’s Favourite Diving Board
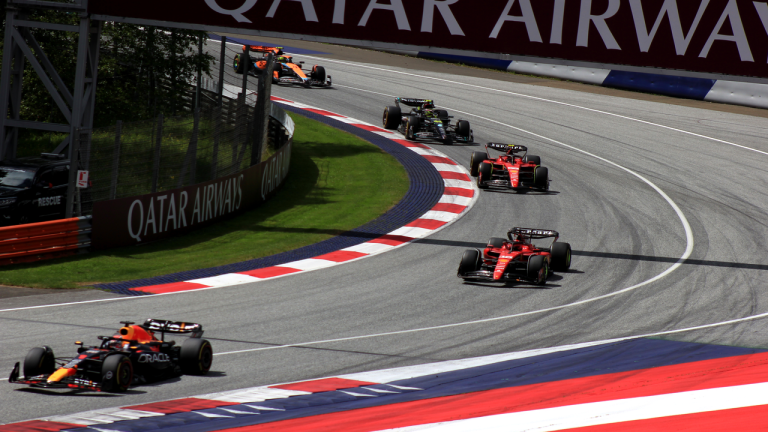
Ask any driver or engineer where the Austrian GP is actually decided and the answer, almost invariably, involves Turn 3. The Remus Hairpin arrives at the crest of a blind, uphill charge from Turn 2, meaning a driver defending the inside line has to commit to their braking point before they can fully read what the attacking car is doing.
Conditions for a brave lunge could hardly be more favourable: the car behind arrives carrying the benefit of Straight Mode from the second SM zone on the uphill section, brakes as late as it dares into a very late braking zone, and drops to first or second gear.
Historically, Turn 3 has produced the bulk of the circuit’s on-track passes in the modern era.
The crest amplifies any discrepancy in braking performance between the two cars: a chasing driver who arrives with fresher rubber, a better power-unit deployment profile, or simply more nerve can carry more speed over the brow and tip into the hairpin on the inside before the car ahead can close the door.
Teams building their strategy around tyre undercut plays are therefore always mindful that a successful in-lap does not guarantee position security — a driver on new tyres can simply overpower a freshly exited rival through this corner.
In 2026, the combination of four Straight Mode zones and the additional power headroom from a well-deployed electrical harvest means approaches to Turn 3 are likely to be even more aggressive than in recent seasons.
Drivers who excel at late-braking duels — and who can manage their energy regeneration during the Sector 2 climb — will hold a structural advantage at the circuit’s most decisive point.
Turn 4: High Reward, High Risk
Immediately following the Remus Hairpin comes the circuit’s most treacherous braking zone. Turn 4 is a downhill, partially blind corner where the entry is notably unforgiving.
Braking into a very late zone and carrying the car into a downhill sweep that punishes any excess of optimism with a swift introduction to the gravel trap, Turn 4 represents the second major overtaking opportunity on the lap — but also the most likely source of retirements and safety-car periods.
No Comments